- 本文链接:1Panel Docker 部署自己的 Mastodon 实例
- 版权声明: 本博客所有文章除特别声明外,均采用
BY-NC-SA 许可协议,转载请注明出处!
1Panel Docker 部署自己的 Mastodon 实例
2025/10/25大约 5 分钟
1Panel Docker 部署自己的 Mastodon 实例
起因是自己也在 Google 找了很久的教程,都没看到 1Panel 面板部署的教程,加上官方的应用商店里面也没有上架 Mastodon,可能是因为太“自由”的缘故吧,然后根据自己的摸索和其他的人的相关教程结合,自己尝试了下,记录下部署的过程,希望能帮助到使用 1Panel 面板的人,废话不多说,直接上教程。
准备工作
- 一个配置还凑合的服务器,最好能有 2C2G 以上的配置。
- 默认我认为你已经安装好了 1Panel 面板。
- 一个自己的域名,由于我的主域名用于了博客,这里使用二级域名
m.liubing.me。 - 提前将域名做好解析。
部署 Mastodon
前置准备
部署之前,我们可以提前准备好下面的内容:
1Panel 面板提前安装好数据库
PostgreSQL和Redis,这些在应用商店直接可以一键安装,安装好后在连接信息中记录下容器的连接地址和端口,后面需要用到。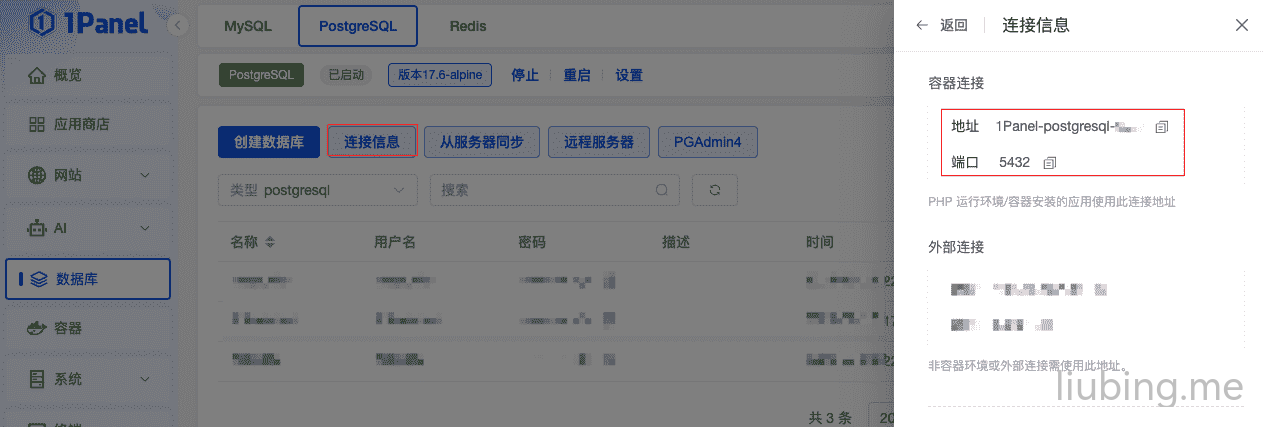
image 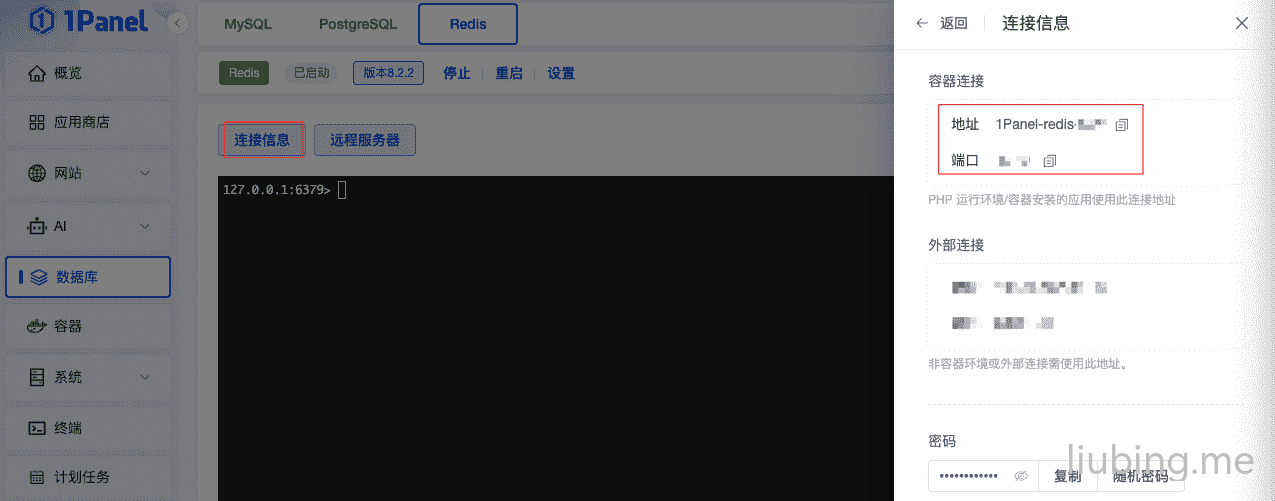
image 提前创建好所需要的数据库,记录下数据库名称、用户名、密码,后面需要用到
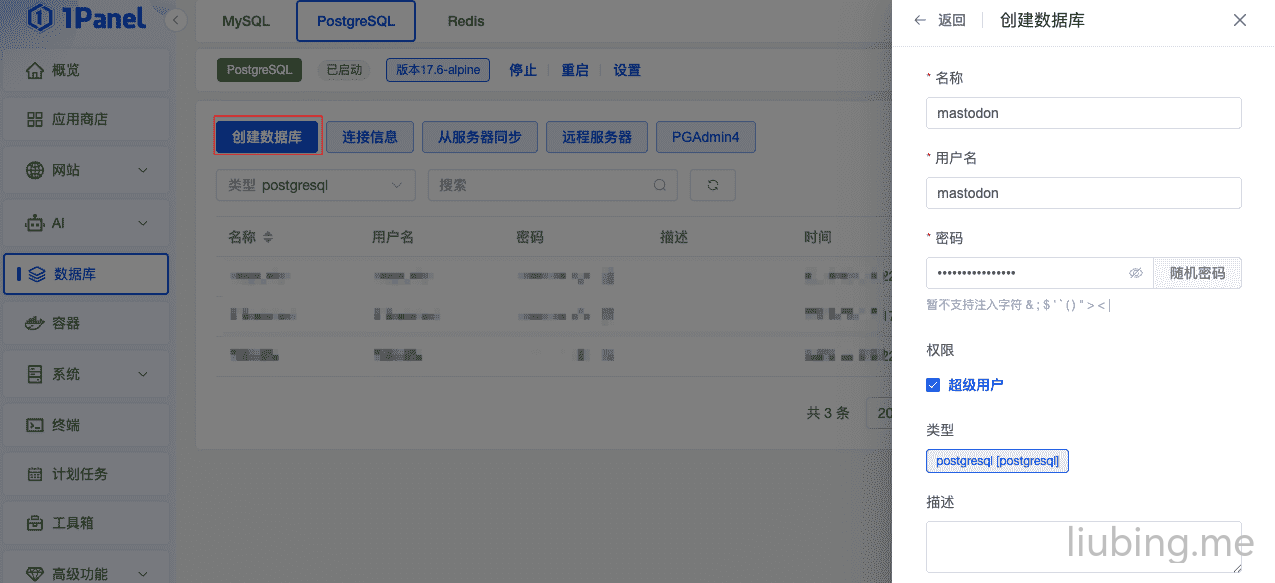
image 创建个反向代理的网站,代理地址填写
127.0.0.1:3050,Mastodon Web 服务端口默认是 3000,由于我的 3000 端口有被占用,所以使用了 3050 端口,同时开启 HTTPS。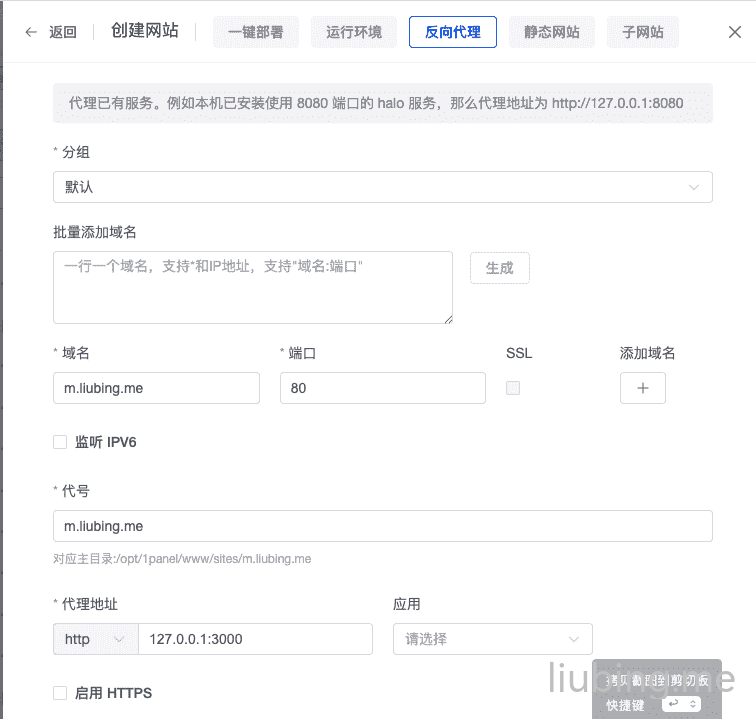
image 进入到刚才创建的网站的目录中,新建个
mastodon目录用于存放相关的数据。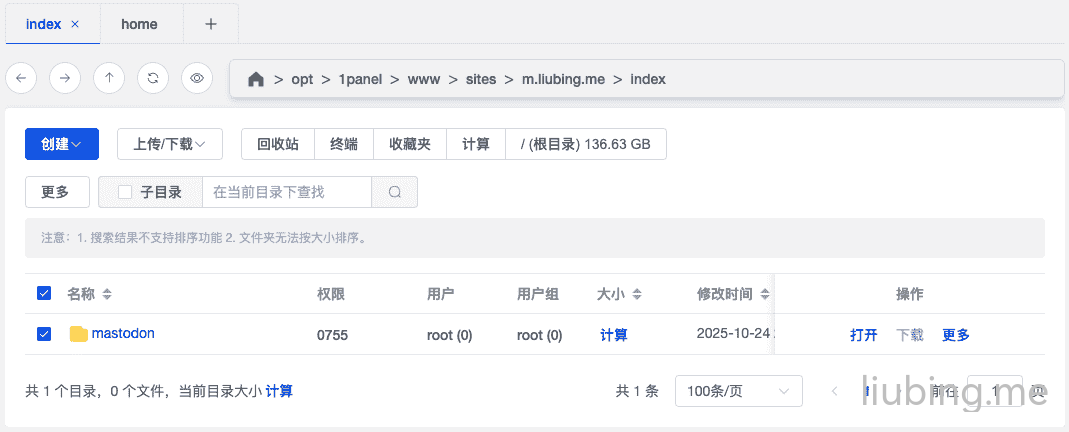
image 进入到上面的
mastodon目录中,新建docker-compose.yml和环境变量配置文件.env.production
docker-compose.yml内容可以参考官方模板,去除掉一些不用的内容和稍加修改下内容如下所示,可以直接复制下面的内容。
注意
需要注意按需修改端口号,由于我的 3000 和 4000 端口被占用了,下面的配置中对应的端口号被我换成了 3050 和 4050。
# This file is designed for production server deployment, not local development work
# For a containerized local dev environment, see: https://github.com/mastodon/mastodon/blob/main/docs/DEVELOPMENT.md#docker

services:
  web:
    # You can uncomment the following line if you want to not use the prebuilt image, for example if you have local code changes
    # build: .
    image: ghcr.io/mastodon/mastodon:latest
    restart: always
    env_file: .env.production
    command: bundle exec puma -C config/puma.rb
    networks:
      - 1panel-network
    healthcheck:
      # prettier-ignore
      test: ['CMD-SHELL',"curl -s --noproxy localhost localhost:3050/health | grep -q 'OK' || exit 1"]
    ports:
      - '127.0.0.1:3050:3000'
      # - es
    volumes:
      - ./public/system:/mastodon/public/system

  streaming:
    # You can uncomment the following lines if you want to not use the prebuilt image, for example if you have local code changes
    # build:
    #   dockerfile: ./streaming/Dockerfile
    #   context: .
    image: ghcr.io/mastodon/mastodon-streaming:latest
    restart: always
    env_file: .env.production
    command: node ./streaming/index.js
    networks:
      - 1panel-network
    healthcheck:
      # prettier-ignore
      test: ['CMD-SHELL', "curl -s --noproxy localhost localhost:4050/api/v1/streaming/health | grep -q 'OK' || exit 1"]
    ports:
      - '127.0.0.1:4050:4000'

  sidekiq:
    # You can uncomment the following line if you want to not use the prebuilt image, for example if you have local code changes
    # build: .
    image: ghcr.io/mastodon/mastodon:latest
    restart: always
    env_file: .env.production
    command: bundle exec sidekiq
    networks:
      - 1panel-network
    volumes:
      - ./public/system:/mastodon/public/system
    healthcheck:
      test: ['CMD-SHELL', "ps aux | grep '[s]idekiq\ [78]' || false"]

networks:
  1panel-network:
    external: true
以上准备工作做完就可以开始正式的部署了。
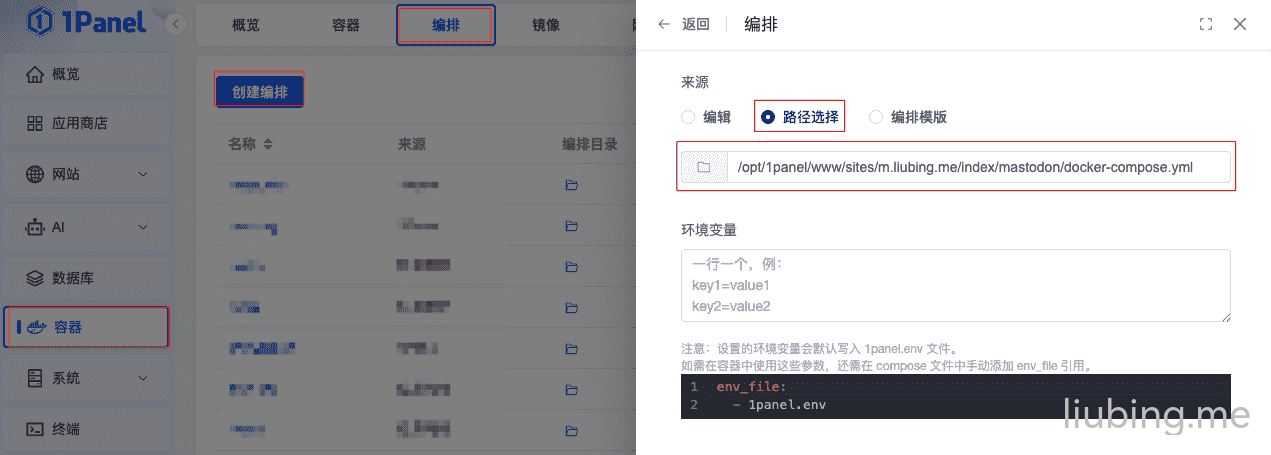
创建编排
进入到容器-编排-创建编排,使用路径选择,复制上面创建的docker-compose.yml的路径填入,确定即可。
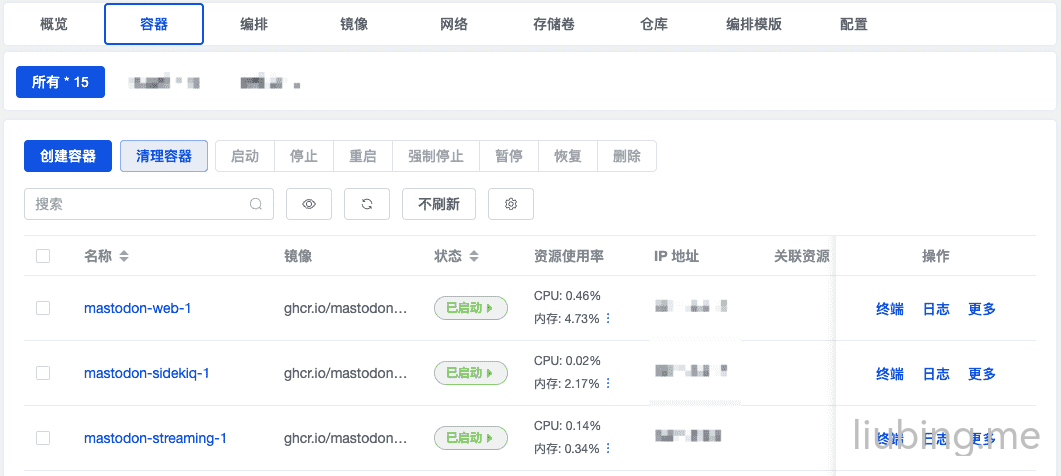
然后在容器列表就能看到新生成的三个 mastodon 容器了,容器状态不管是啥,手动先将状态设置成停止。
环境变量配置
使用 shell 工具或者面板自带的终端链接到服务器,执行下面的命令进行配置 Mastodon,获取我们需要的.env.production内容,执行命令后会引导我们进行配置,按需进行配置,完事后会显示一份配置,将内容复制到.env.production中,后面我们还需要重新修改下生成的内容。
docker compose run --rm web bundle exec rake mastodon:setup整理了下环境变量内容,可以按需修改。
网站配置:如果你和我一样是部署在二级域名上的,如
m.liubing.me,但想要账号想要@name@liubing.me这种形式的,就需要设置LOCAL_DOMAIN为liubing.me,WEB_DOMAIN设置成m.liubing.me,注意 ⚠️ 这 2 个 DOMAIN 内容设置后后期就不能修改了。如果你是单人使用,可以将 SINGLE_USER_MODE 设置成 true。密钥配置:这个可以直接复制使用上面命令生成配置内容中的密钥。
数据库配置和 Redis 配置:将
前置准备中的连接信息按需填写即可。S3 配置:如果不需要可以注释掉,我自己搭建了Rust,修改相关配置修改即可使用,如果是其他的可以参考文档Object storage S3
邮件配置:我使用的是阿里云的邮件服务,按需配置即可。
更多支持的环境变量请参考官方的环境变量列表,按需添加。
# 网站配置
LOCAL_DOMAIN=liubing.me
WEB_DOMAIN=m.liubing.me
SINGLE_USER_MODE=true

# 密钥配置
SECRET_KEY_BASE=
ACTIVE_RECORD_ENCRYPTION_DETERMINISTIC_KEY=
ACTIVE_RECORD_ENCRYPTION_KEY_DERIVATION_SALT=
ACTIVE_RECORD_ENCRYPTION_PRIMARY_KEY=
VAPID_PRIVATE_KEY=
VAPID_PUBLIC_KEY=

# 数据库配置
DB_HOST=1Panel-postgresql-xxxx
DB_PORT=5432
DB_NAME=mastodon
DB_USER=mastodon
DB_PASS=xxxx

# Redis配置
REDIS_HOST=1Panel-redis-xxxx
REDIS_PORT=6379
REDIS_PASSWORD=xxxx

# S3配置
S3_ENABLED=true
S3_PROTOCOL=https
S3_REGION=us-east-1
S3_ENDPOINT=https://oss.liubing.me
S3_HOSTNAME=oss.liubing.me
S3_BUCKET=mastodon
AWS_ACCESS_KEY_ID=xxxx
AWS_SECRET_ACCESS_KEY=xxxx

# 邮件配置
SMTP_SERVER=smtp.qiye.aliyun.com
SMTP_PORT=465
SMTP_LOGIN=xxxx
SMTP_PASSWORD=xxxx
SMTP_FROM_ADDRESS=xxxx
SMTP_AUTH_METHOD=plain
SMTP_ENABLE_STARTTLS_AUTO=false
SMTP_TLS=true
SMTP_OPENSSL_VERIFY_MODE=none
启动服务
万事具备,只欠东风,回到容器列表,将三个 mastodon 服务勾选上启动即可。
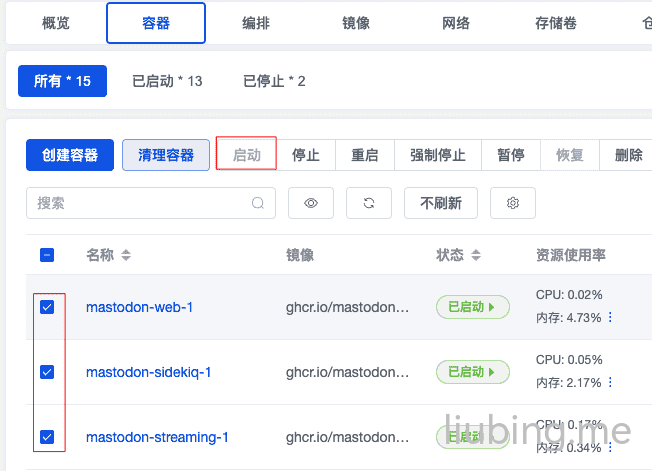
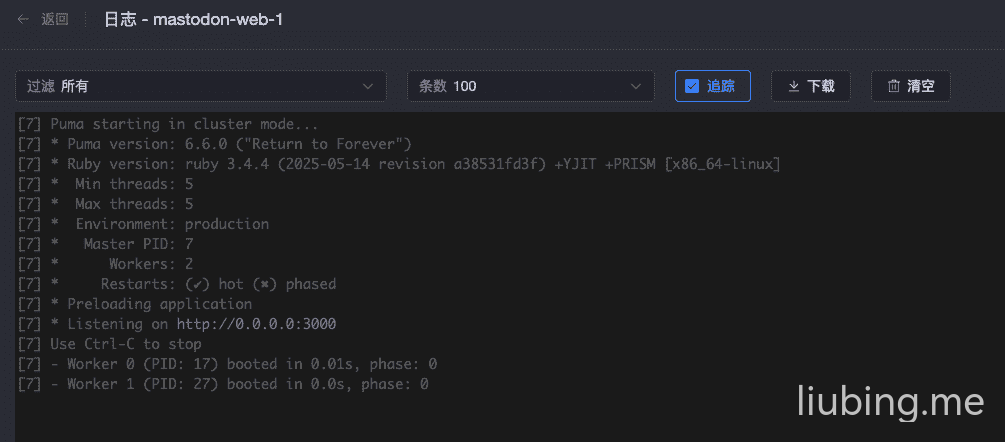
如果一切正常的话,在日志中可以看到Listening on的字样,表示服务启动成功了,对应的端口正在监听中。

最后访问https://m.liubing.me如果能看到正常的页面就说明部署成功了。
其他
重置管理员密码
如果不知道登录密码或者无法收到忘记密码的邮件,可以通过管理命令里面的tootctl accounts modify命令进行重置密码。
其中mastodon-web-1换成实际的 web 服务器的容器名称,XXX 换成实际的用户名,执行成功后会显示一个随机生成的密码。
docker exec mastodon-web-1 tootctl accounts modify XXX Cloudflare
 1Panel
 VuePress
 VuePress Theme Hope