- 本文链接:跟着 Vue 官方成员大佬学习组件二次封装技巧
- 版权声明: 本博客所有文章除特别声明外,均采用
BY-NC-SA 许可协议,转载请注明出处!
跟着 Vue 官方成员大佬学习组件二次封装技巧
2025/6/22大约 6 分钟
跟着 Vue 官方成员大佬学习组件二次封装技巧
日常任务开发过程中避免不了进行 UI 组件库部分组件的二次封装使用,记录下长期开发过程中积累的一些经验和网络学习的新技巧,组件二次封装需要解决的无非就是属性 props 如何透传出去,如何复用原有组件的插槽,以及如何调用原组件暴露的方法,这里以比较热门的 UI 框架 Element Plus 为例。
属性 Props 透传
最常规的做法就是直接使用v-bind="$attrs",直接可以将属性和事件透传出去,缺点在使用组件的时候编辑器就无法做到属性和事件的提示了。
<template>
  <div class="custom-input">
    <div>自定义封装的Input</div>
    <ElInput v-bind="$attrs" />
  </div>
</template>

<script lang="ts" setup></script>
TS 支持
此时我们可以定义一个 props,使用组件自带的 Props 类型
<template>
  <div class="custom-input">
    <div>自定义封装的Input</div>
    <el-input v-bind="$attrs" />
  </div>
</template>

<script lang="ts" setup>
import type { InputProps } from 'element-plus'

// defineProps<Partial<InputProps>>()
defineProps<ExtractPropTypes<InputProps>>()
</script>但是这样使用Partial会将所有属性都转换成非必填,在组件使用的时候如果该组件有些属性是必填的也不会有类型的报错提示了,这样就不太严谨了,我们可以参考Element Plus的代码使用ExtractPropTypes,从组件的 props 配置中提取出对应的 TypeScript 类型。
最后我们抽取一个自定义的 props 类型,以便支持自定义属性和默认值。
注意
- 需要添加
inheritAttrs: false,不然事件会被触发 2 次。 - 最后需要加
defineExpose<InputInstance>(),不然编辑器的相关提示出不来。
<template>
<div class="custom-input">
<div>{{ title }}</div>
<el-input v-bind="{ ...$attrs, ...props }" />
</div>
</template>
<script lang="ts" setup>
import type { InputInstance, InputProps } from 'element-plus'
import type { ExtractPropTypes } from 'vue'
interface CustomInputProps extends ExtractPropTypes<InputProps> {
// 自定义的一些参数
title?: string
}
defineOptions({
inheritAttrs: false
})
const props = withDefaults(defineProps<CustomInputProps>(), {
title: '自定义封装的Input', // 自定义参数默认值
clearable: true // el-input clearable 默认设置成 true
})
defineExpose<InputInstance>()
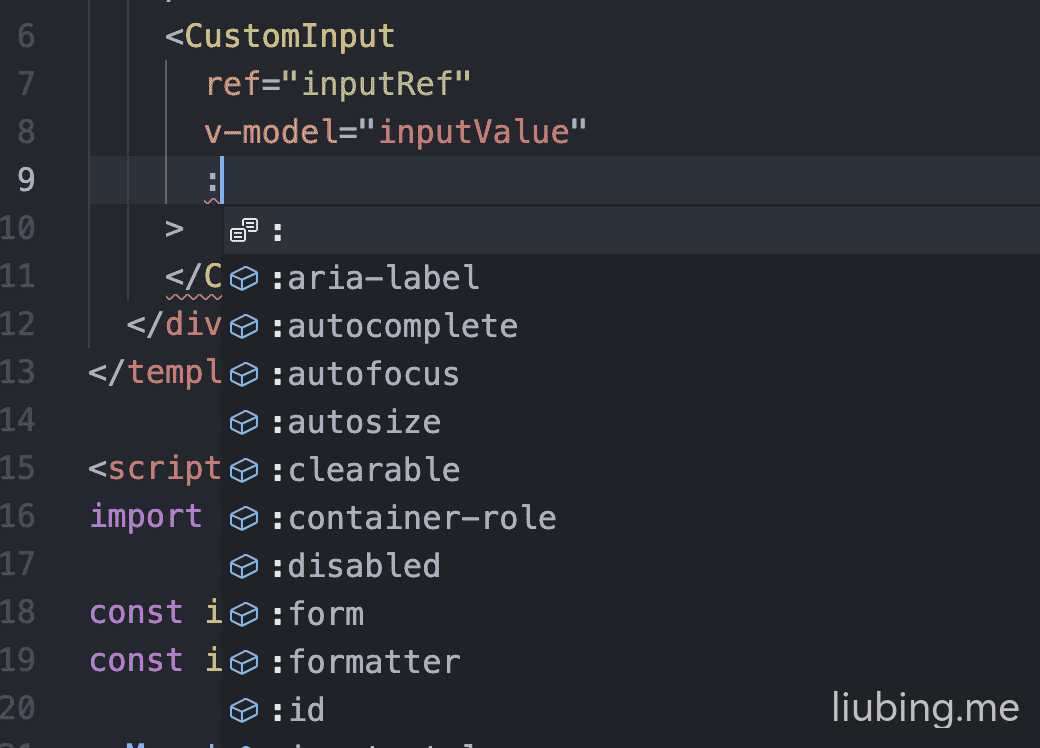
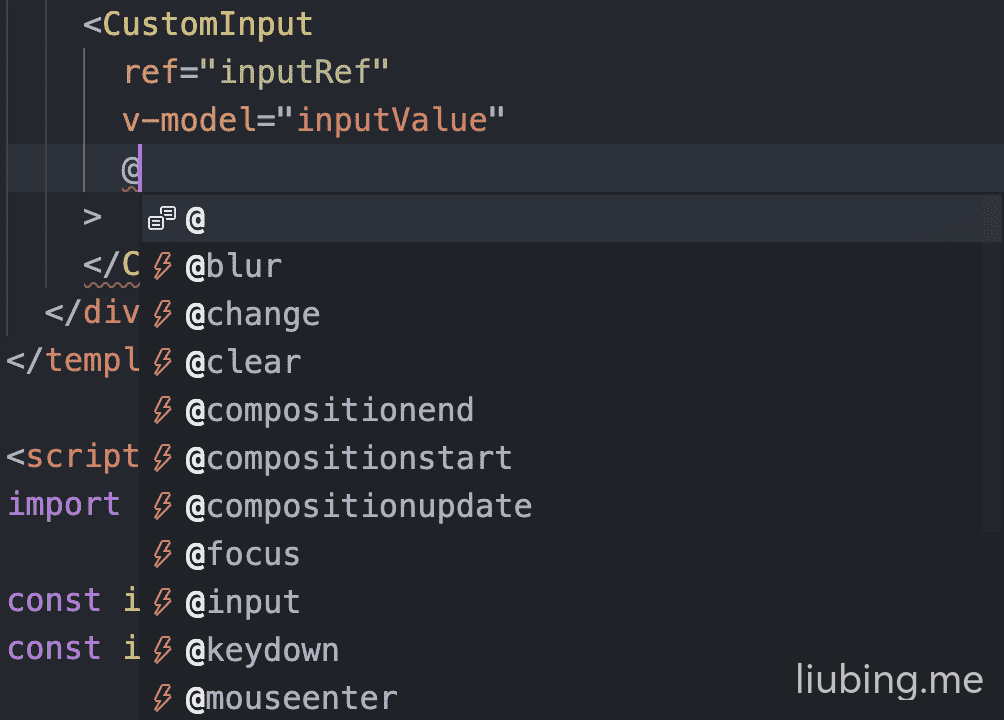
</script>props 参数和相关事件均有提示
插槽透传
常规写法
常规做法一般都是需要哪些插槽透传就写哪些插槽透传,如果需要支持全部的插槽,大部分人的写法基本都是就直接循环$slots,将所有插槽都透传出去。
#[name]="slotProps" 写法等同于 v-slot:[name]="slotProps"
<template v-for="(_, name) in $slots" :key="name" #[name]="slotProps">
  <slot :name="name" v-bind="slotProps"></slot>
</template>
h 函数写法
使用h函数进行component渲染,第一个参数渲染的元素,这里直接引入ElInput,第二个参数是相关的属性,第三个参数就是插槽了。
注意
如果组件没有样式了,请单独引入该组件的样式文件,Element Plus 可以参考文档中的手动导入。
<template>
  <div class="custom-input">
    <div>{{ title }}</div>
    <component :is="h(ElInput, { ...$attrs, ...props }, $slots)" />
  </div>
</template>

<script lang="ts" setup>
import { h } from 'vue'
import { ElInput } from 'element-plus'
import type { InputInstance, InputProps } from 'element-plus'
import type { ExtractPropTypes } from 'vue'

interface CustomInputProps extends ExtractPropTypes<InputProps> {
  // 自定义的一些参数
  title?: string
}

defineOptions({
  inheritAttrs: false
})

const props = withDefaults(defineProps<CustomInputProps>(), {
  title: '自定义封装的Input', // 自定义参数默认值
  clearable: true // el-input clearable 默认设置成 true
})

defineExpose<InputInstance>()
</script>
使用
<template>
<div>
<CustomInput v-model="inputValue" @input="handleInput">
<template #append>
<div>append</div>
</template>
<template #prepend>
<div>prepend</div>
</template>
</CustomInput>
</div>
</template>
<script lang="ts" setup>
import { ref } from 'vue'
const inputValue = ref('liubing.me')
function handleInput() {
console.log('input')
}
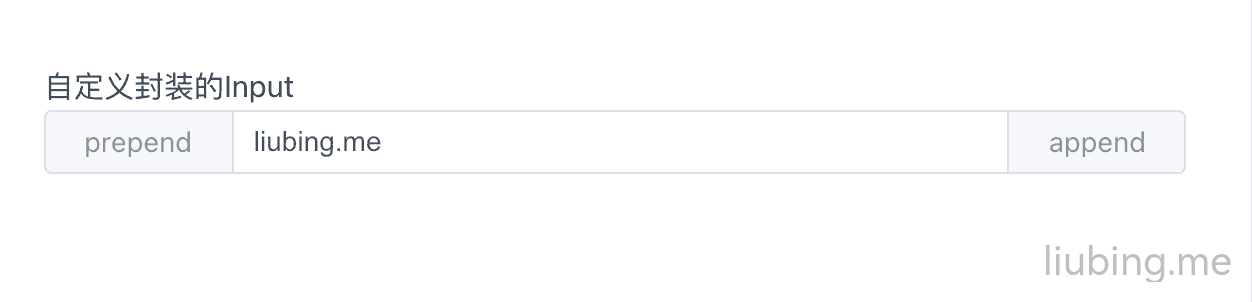
</script>预览
Ref 调用
通常组件可以通过 Ref 的形式去调用内部defineExpose暴露的方法,二次封装的组件肯定也是需要支持的,最简单的做法就是将原组件暴露的方法再次使用defineExpose暴露出去
简单版本
<template>
  <div class="custom-input">
    <div>{{ title }}</div>
    <el-input :ref="changeRef" v-bind="{ ...$attrs, ...props }">
      <template v-for="(_, name) in $slots" :key="name" #[name]="slotProps">
        <slot :name="name" v-bind="slotProps" />
      </template>
    </el-input>
  </div>
</template>

<script lang="ts" setup>
import type { InputInstance, InputProps } from 'element-plus'
import { getCurrentInstance, ref } from 'vue'
import type { ExtractPropTypes, Ref } from 'vue'

interface CustomInputProps extends ExtractPropTypes<InputProps> {
  // 自定义的一些参数
  title?: string
}

defineOptions({
  inheritAttrs: false
})

const props = withDefaults(defineProps<CustomInputProps>(), {
  title: '自定义封装的Input', // 自定义参数默认值
  clearable: true // el-input clearable 默认设置成 true
})
const vm = getCurrentInstance()

function changeRef(inputInstance: Record<string, any> | null) {
  if (vm) {
    vm.exposeProxy = vm.exposed = (inputInstance || {}) as InputInstance
  }
}

defineExpose((vm?.exposeProxy || {}) as InputInstance)
</script>
h 函数版
<template>
  <div class="custom-input">
    <div>{{ title }}</div>
    <component
      :is="h(ElInput, { ...$attrs, ...props, ref: changeRef }, $slots)"
    />
  </div>
</template>

<script lang="ts" setup>
import { getCurrentInstance, h } from 'vue'
import { ElInput } from 'element-plus'
import type { InputInstance, InputProps } from 'element-plus'
import type { ExtractPropTypes } from 'vue'

defineOptions({
  inheritAttrs: false
})

const props = withDefaults(defineProps<CustomInputProps>(), {
  title: '自定义封装的Input', // 自定义参数默认值
  clearable: true // el-input clearable 默认设置成 true
})

interface CustomInputProps extends ExtractPropTypes<InputProps> {
  // 自定义的一些参数
  title?: string
}

const vm = getCurrentInstance()

function changeRef(inputInstance: Record<string, any> | null) {
  if (vm) {
    vm.exposeProxy = vm.exposed = (inputInstance || {}) as InputInstance
  }
}

defineExpose((vm?.exposeProxy || {}) as InputInstance)
</script>
最终版本
最终版本加入了自定义事件的暴露和自定义事件的派发。
基础版
<template>
  <div class="custom-input">
    <div @click="handleTitleClick">
      {{ title }}
    </div>
    <el-input :ref="changeRef" v-bind="{ ...$attrs, ...props }">
      <template v-for="(_, name) in $slots" :key="name" #[name]="slotProps">
        <slot :name="name" v-bind="slotProps" />
      </template>
    </el-input>
  </div>
</template>

<script lang="ts" setup>
import type { InputInstance, InputProps } from 'element-plus'
import { getCurrentInstance } from 'vue'
import type { ExtractPropTypes } from 'vue'

export interface CustomInputProps extends ExtractPropTypes<InputProps> {
  // 自定义的一些参数
  title?: string
}

export interface CustomInputInstance extends InputInstance {
  // 自定义暴露的方法
  someClick: () => void
}

defineOptions({
  inheritAttrs: false
})

const props = withDefaults(defineProps<CustomInputProps>(), {
  title: '自定义封装的Input', // 自定义参数默认值
  clearable: true // el-input clearable 默认设置成 true
})
const emit = defineEmits<{
  // 自定义事件
  (e: 'titleClick'): void
}>()
const vm = getCurrentInstance()

function changeRef(inputInstance: Record<string, any> | null) {
  if (vm) {
    vm.exposeProxy = vm.exposed = Object.assign(inputInstance || {}, {
      someClick
    }) as CustomInputInstance
  }
}

function someClick() {
  console.log('someClick')
}

function handleTitleClick() {
  emit('titleClick')
}

defineExpose((vm?.exposeProxy || {}) as CustomInputInstance)
</script>
h 函数版
<template>
  <div class="custom-input">
    <div @click="handleTitleClick">
      {{ title }}
    </div>
    <component
      :is="h(ElInput, { ...$attrs, ...props, ref: changeRef }, $slots)"
    />
  </div>
</template>

<script lang="ts" setup>
import { getCurrentInstance, h } from 'vue'
import { ElInput } from 'element-plus'
import type { InputInstance, InputProps } from 'element-plus'
import type { ExtractPropTypes } from 'vue'

export interface CustomInputProps extends ExtractPropTypes<InputProps> {
  // 自定义的一些参数
  title?: string
}

export interface CustomInputInstance extends InputInstance {
  // 自定义暴露的方法
  someClick: () => void
}

defineOptions({
  inheritAttrs: false
})

const props = withDefaults(defineProps<CustomInputProps>(), {
  title: '自定义封装的Input', // 自定义参数默认值
  clearable: true // el-input clearable 默认设置成 true
})
const emit = defineEmits<{
  // 自定义事件
  (e: 'titleClick'): void
}>()

const vm = getCurrentInstance()

function changeRef(inputInstance: Record<string, any> | null) {
  if (vm) {
    vm.exposeProxy = vm.exposed = Object.assign(inputInstance || {}, {
      someClick
    })
  }
}

function someClick() {
  console.log('someClick')
}

function handleTitleClick() {
  emit('titleClick')
}

defineExpose((vm?.exposeProxy || {}) as CustomInputInstance)
</script>
使用
<template>
  <div>
    <CustomInput
      ref="inputRef"
      v-model="inputValue"
      @input="handleInput"
      @title-click="handleTitleClick"
    >
      <template #append>
        <div>append</div>
      </template>
      <template #prepend>
        <div>prepend</div>
      </template>
    </CustomInput>
    <el-button @click="handleClear"> Clear </el-button>
  </div>
</template>

<script lang="ts" setup>
import type { CustomInputInstance } from '@/components/CustomInput.vue'
import { ref } from 'vue'

const inputValue = ref('liubing.me')
const inputRef = ref<CustomInputInstance>()

function handleInput() {
  console.log('input')
}

function handleClear() {
  inputRef.value?.clear()
}

function handleTitleClick() {
  console.log('TitleClick')
  inputRef.value?.someClick()
}
</script>
结语
多看看大佬的视频果然是能够学习到新技巧和知识的。最后大家可以按需删减代码使用Snippet Generator工具生成编辑器的代码片段,以便快速输入。
 Cloudflare
 1Panel
 VuePress
 VuePress Theme Hope